Creating an EBS Volume
To Enable Multi-Attach When Creating a Volume
-
Open the Amazon EC2 console at https://console.aws.amazon.com/ec2/.
-
In the navigation pane, select Volumes.
-
Choose Create volume.

-
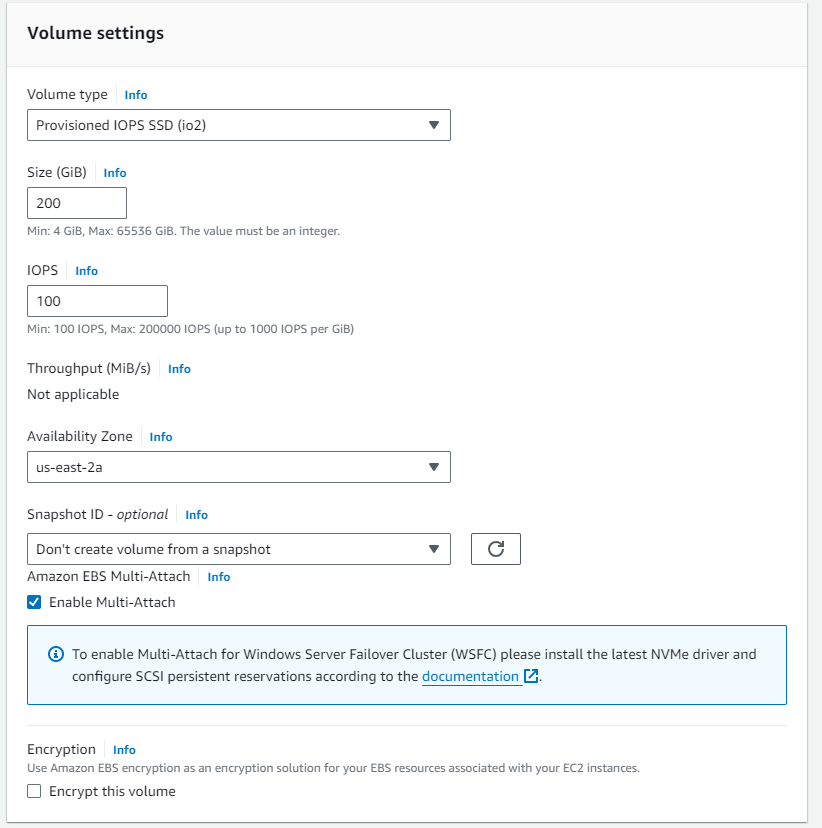
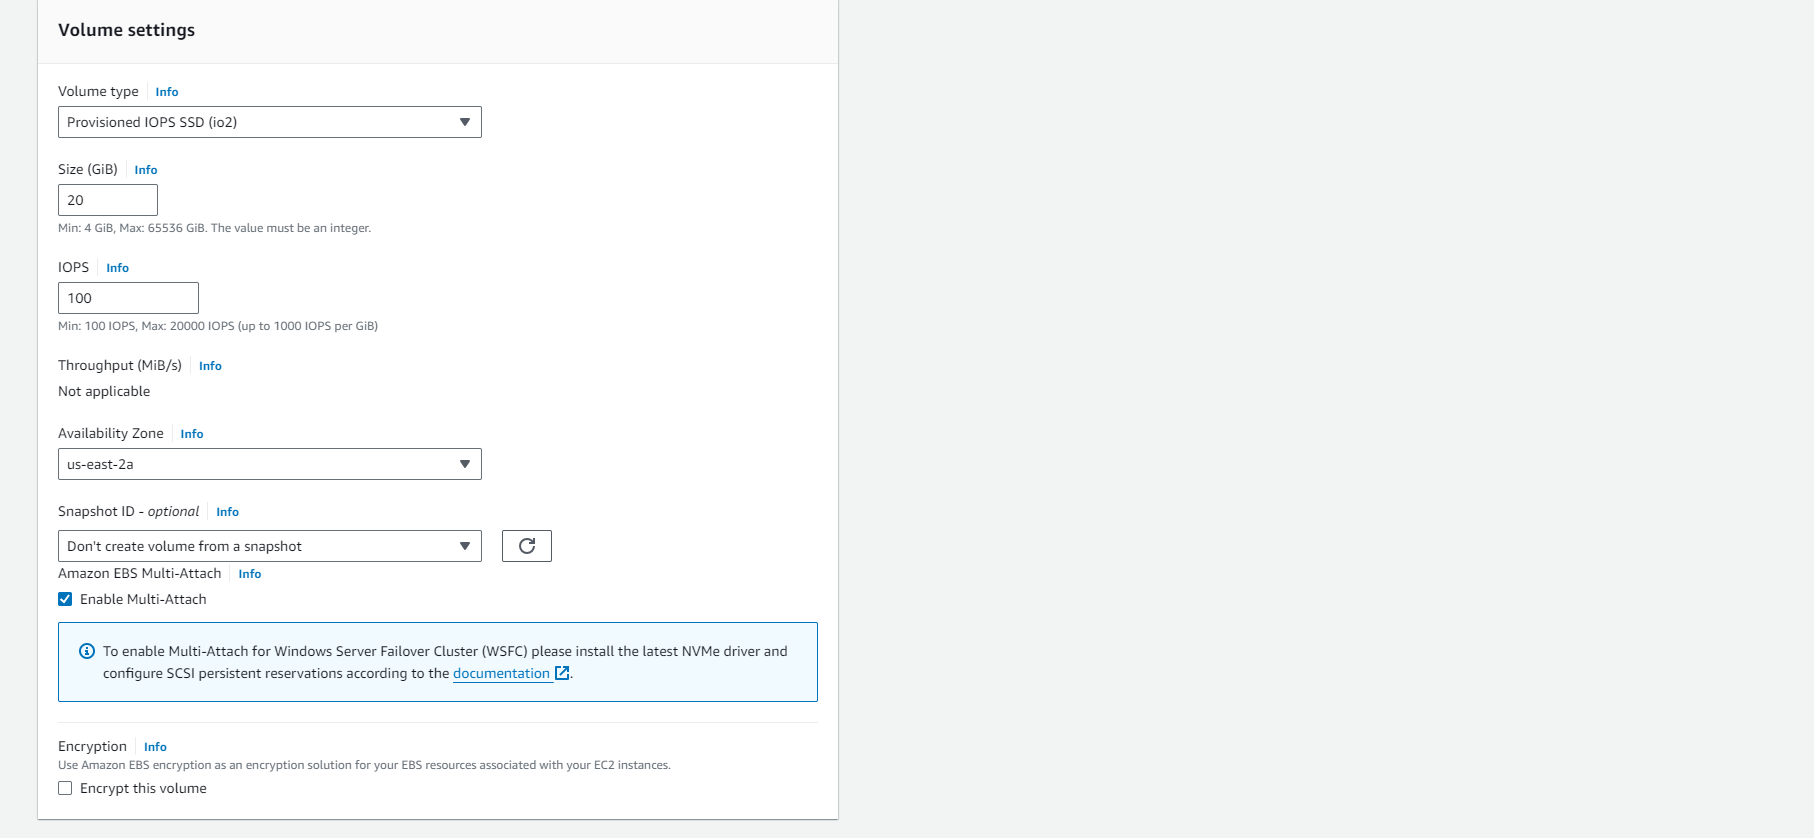
For Volume type, select Provisioned IOPS SSD (io2).
-
For Size and IOPS, choose the required volume size and the number of IOPS to allocate.
-
For Availability Zone, select the same Availability Zone as the instances.
-
For Amazon EBS Multi-Attach, choose Enable Multi-Attach.
-
(Optional) For Snapshot ID, select a snapshot to create the volume from.
-
Set up the encryption status for the volume.
-
If the chosen snapshot is already encrypted, or if your account has default encryption activated, encryption will be automatically enabled and you cannot disable it. You can choose a KMS key for volume encryption.
-
If the chosen snapshot is not encrypted and your account does not have default encryption activated, encryption is optional. To encrypt the volume, choose Encryption, select Encrypt this volume, and then choose a KMS key for volume encryption.
- Only encrypted volumes can be attached to instances that support Amazon EBS encryption. For more information, see Amazon EBS encryption.
-
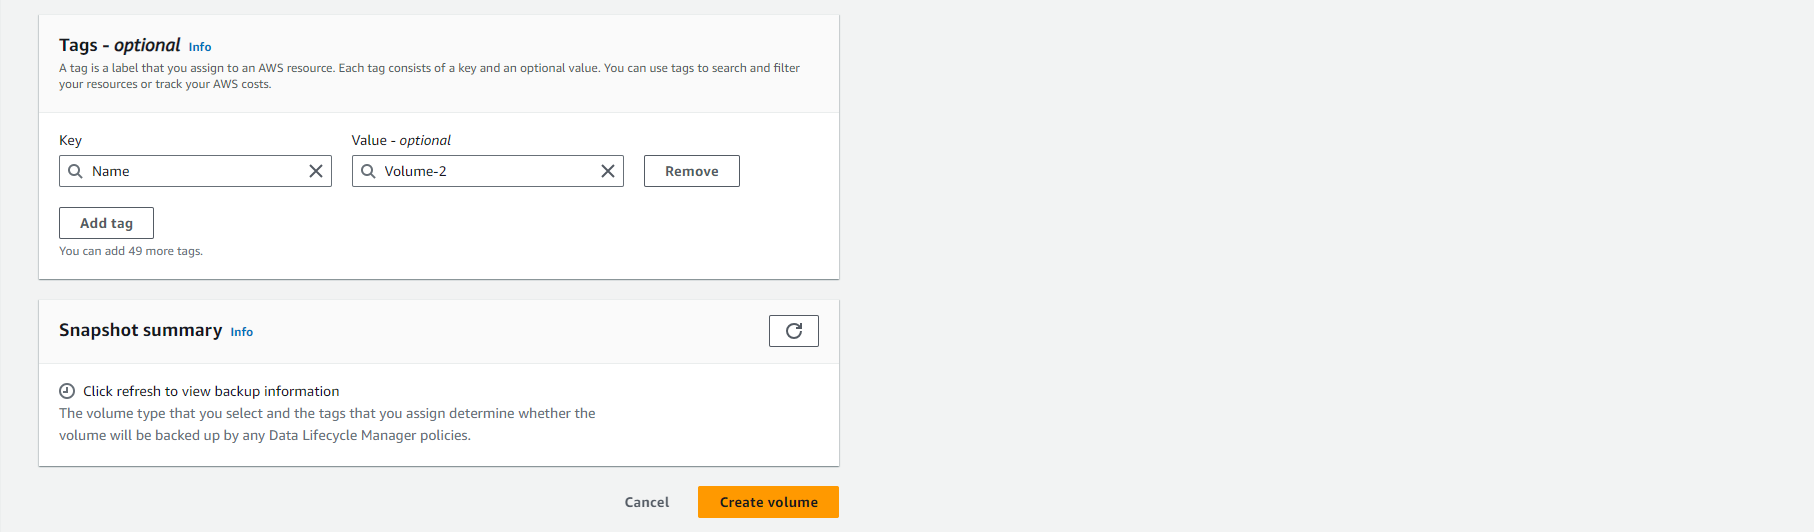
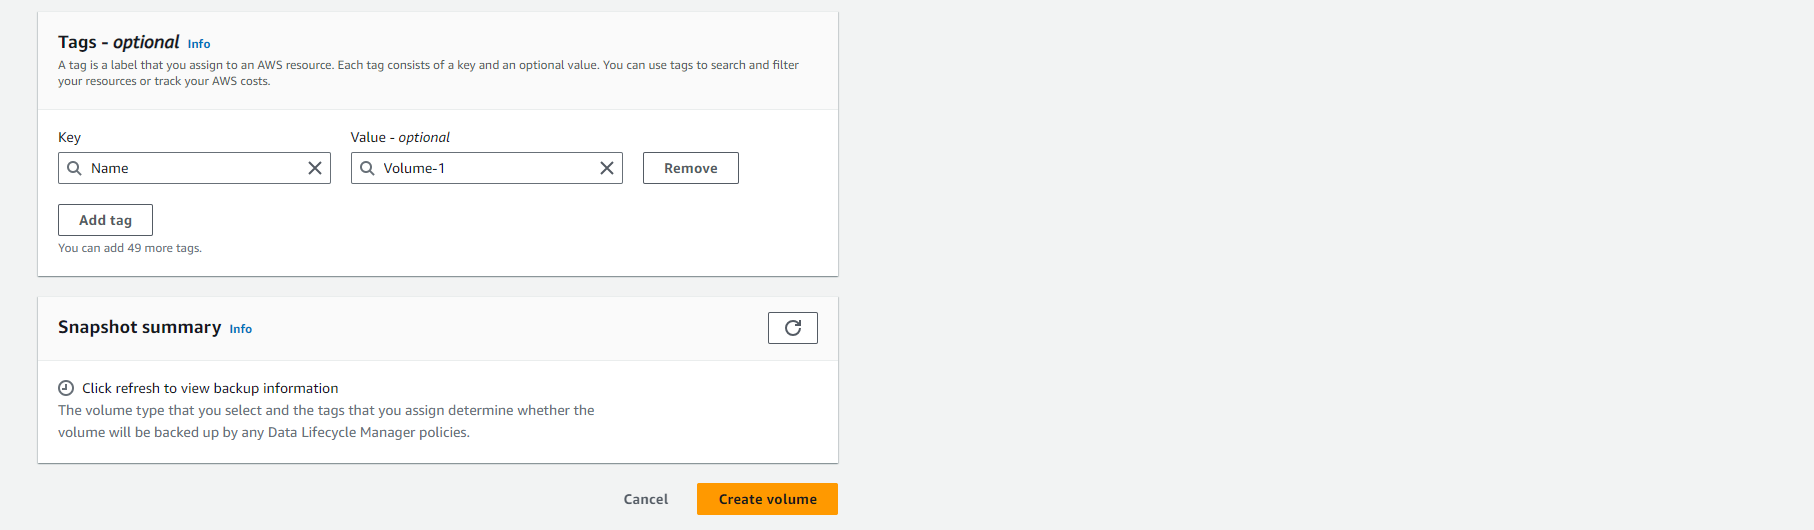
(Optional) To assign custom tags to the volume, in the Tags section, choose Add tag, then enter the key-value pair for the tag. For more information, see Tag your Amazon EC2 resources.
-
Choose Create volume.
To Attach an EBS Drive to an Instance Using the Console Interface
-
Open the Amazon EC2 console at https://console.aws.amazon.com/ec2/.
-
In the navigation pane, select Volumes.
-
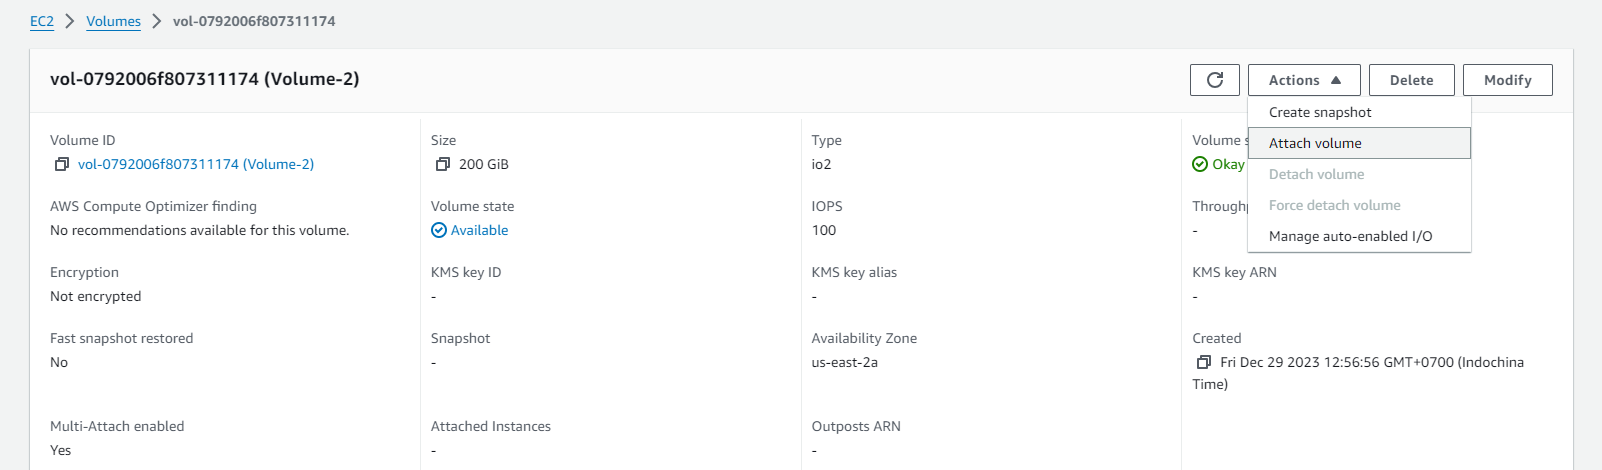
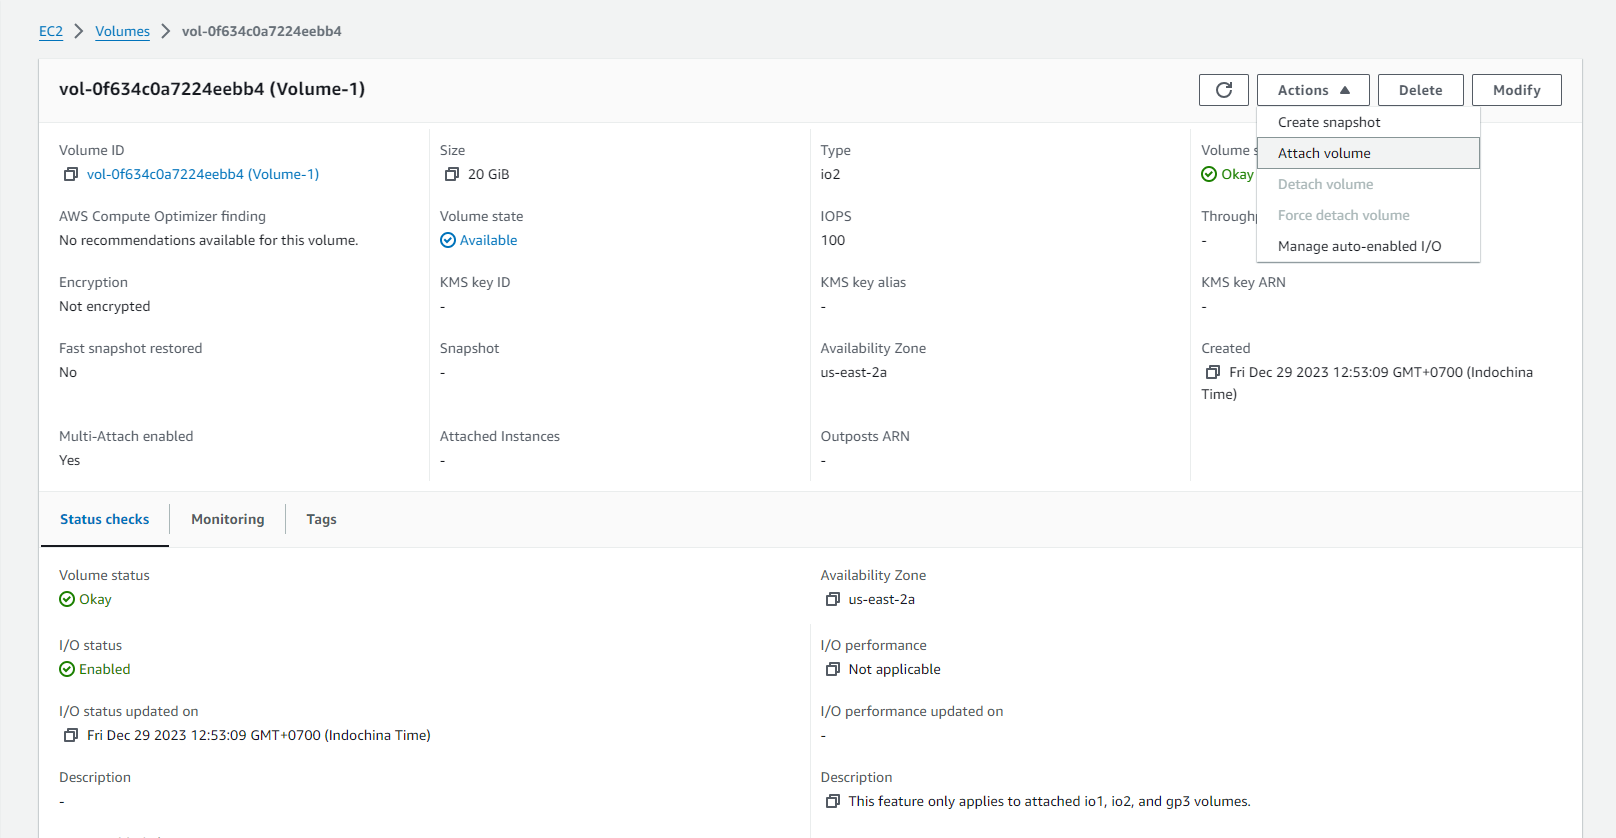
Choose the drive to attach and select Actions, Attach volume.
Note:
- You can only attach drives in the Available state.
-
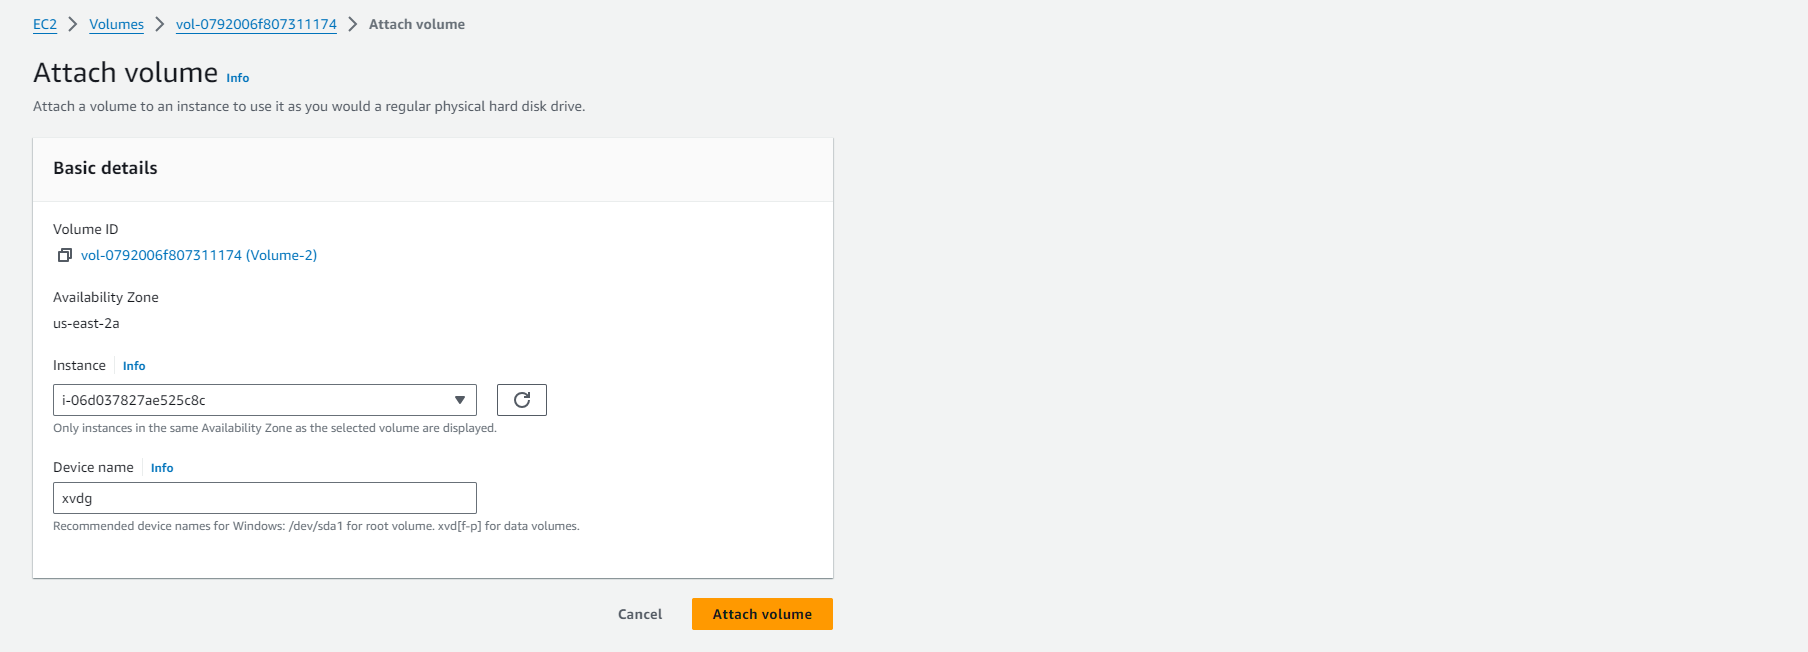
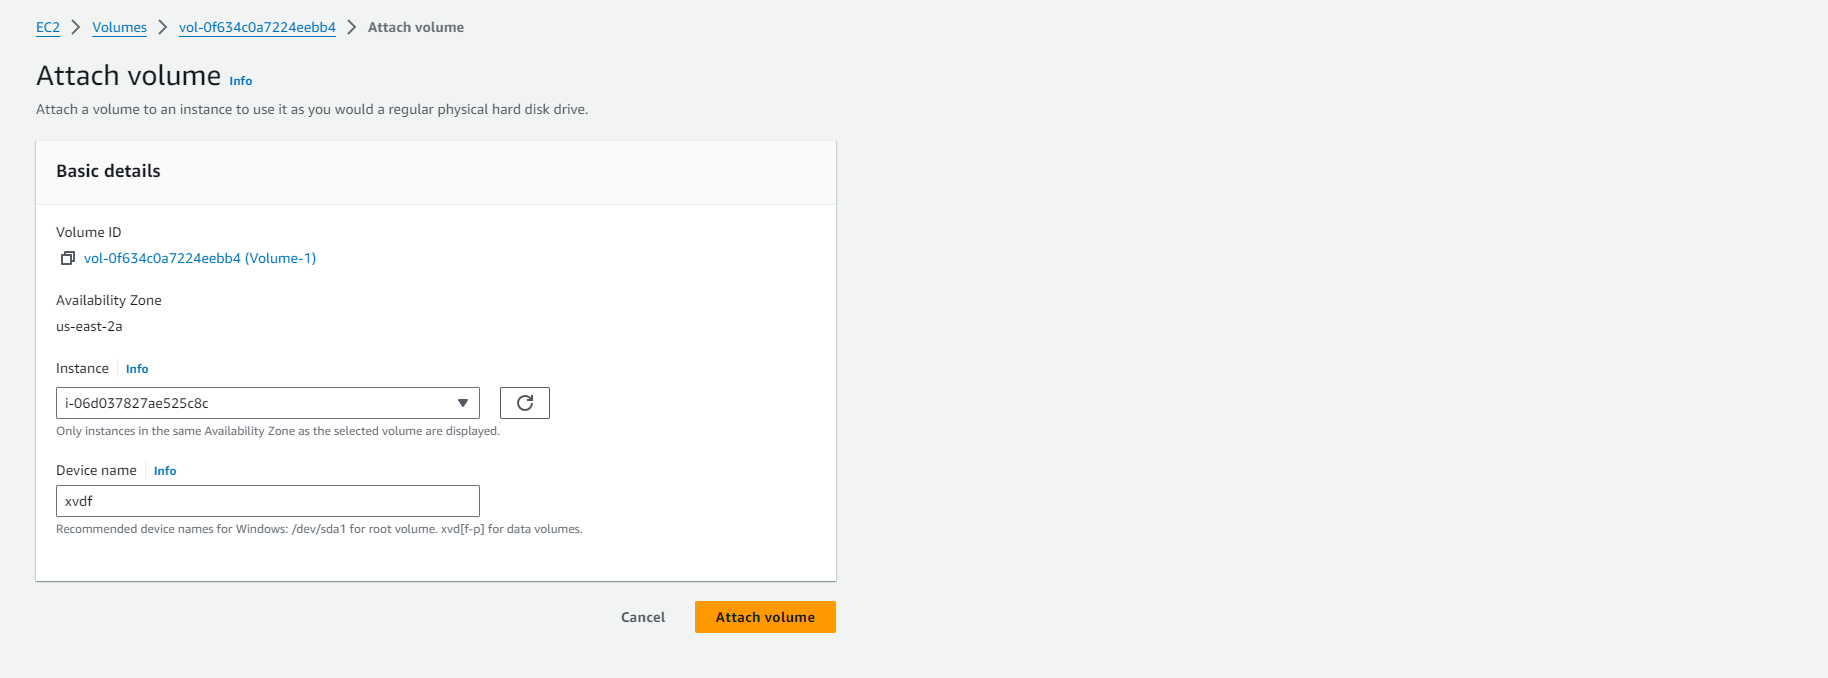
For Instance, enter the ID of the instance or select it from the dropdown list.
Note:
- The drive must be attached to an instance in the same Availability Zone.
-
If the drive is encrypted, it can only be attached to instance types that support Amazon EBS encryption. For more information, see Amazon EBS encryption.
-
For Device name, enter the supported device name for the drive. This device name is used by Amazon EC2.
-
Choose Attach volume.
- Follow similar steps for Volume 2.